

Before you start
- Create an account and sign in.
- Confirm that your account has access to the group you need, with sufficient balance or a valid subscription. Add funds if needed.
- Choose a clear purpose, such as
codex-work,claude-dev, orimage-api. The name helps you identify the key; it does not select a protocol or model.
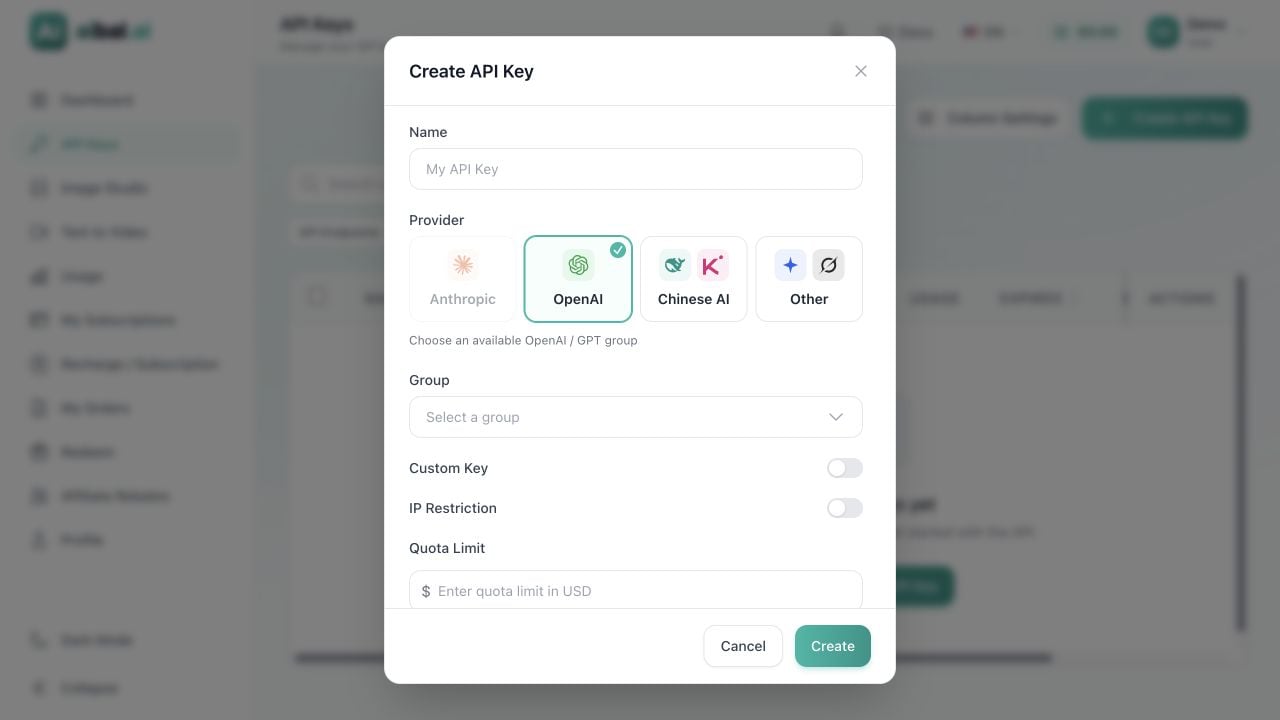
Create an API key: name, provider, group, and optional settings
Create a key
1
Open the API keys page
Select API keys in the dashboard, or open the keys page directly. Click Create key.
2
Enter a descriptive name
Enter a recognizable name in Name. Use different names for different clients so you can find the right key later.
3
Choose a provider and group
Select a Provider, then choose an available service Group. Read its description and billing multiplier to confirm that it supports your intended models and connection method.You must select a group. Models are selected later in your client or request, not in this dialog. A provider may be unavailable if your account has no accessible groups for it.
4
Set a quota, expiry, and optional restrictions
For your first key, enter a suitable spending cap under Quota limit and enable Key expiration. Configure IP restrictions if requests should only come from a fixed server.Usually, leave Custom key disabled and let the system generate the key. See the field reference below for the other settings.
5
Create and copy the key
Review your settings and click Create. After the success message, find the key by name in the list and click its copy button.The list masks the displayed key, but the copy button copies its complete value. Save it in a password manager, your client’s secure credential settings, or a local environment variable.
6
View the connection settings
Click Use key on that row to view client settings for the selected group. Enter the API address and key as required by your client; address formats can differ between clients.Once configured, make one small request and check Usage records and the key’s usage. Actual requests may incur charges.
Fields and limits
A key quota is not account balance. Setting a 10 USD cap does not add 10 USD to your account. Leaving a key unlimited does not make usage free or remove account, subscription, or group limits. All applicable limits still apply.
Check and manage your key
- Confirm that its status is Active, with the intended group and expiry.
- Check usage and quota in the list, and individual requests under Usage records.
- Use Edit key to change settings. After switching groups, check that the client’s model and protocol remain compatible.
- Use Disable to pause access or Delete key when it is no longer needed. Deletion cannot be undone, and clients using that key will lose access.
Troubleshooting
No groups are available
Select the intended provider and confirm that your account has access to a matching group or subscription. Do not choose an incompatible group just to continue. If no suitable option is available, contact support through the site.Can I copy the key again later?
Yes. Use the copy button in the API keys list. The masked text displayed on the page is not a usable key. Do not paste the complete key into a chat or screenshot to inspect it.Why do requests fail even though I have account balance?
Check whether the key is disabled, expired, out of quota, or at a window spending limit. Then check the group, model, API address, and IP restrictions. Account balance alone does not guarantee access to a particular group or subscription.Requests stopped after I enabled an IP whitelist
Use the public outbound IP address of the requesting device or server, not its private local address, commonly beginning with192.168 or 10. A VPN, proxy, or mobile network may change the outbound IP. Confirm your network setup before configuring the whitelist.