

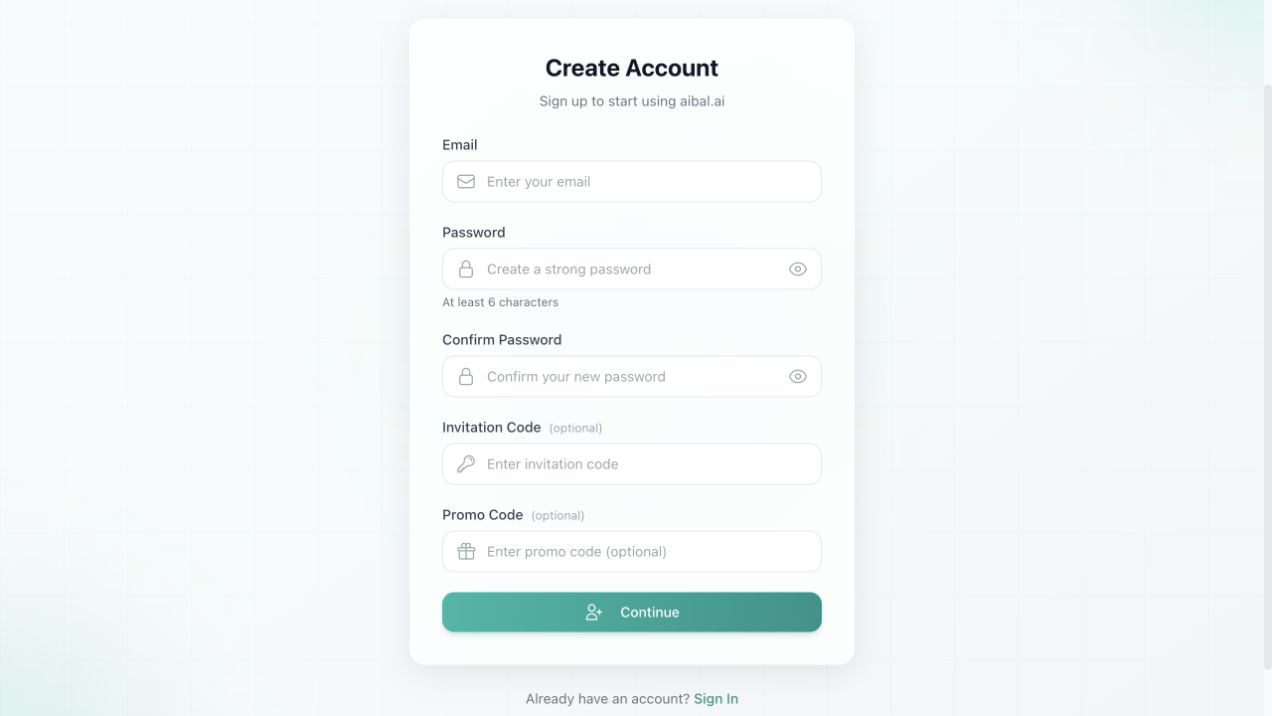
The aibal.ai registration page
Before you start
- Use an email address that can receive messages. The verification code is sent there.
- Your password must contain at least 6 characters. Use a password that you do not reuse elsewhere.
- Invitation and promo codes are optional when the fields are shown.
Registration steps
1
Open the registration page
Open aibal.ai, click Get started, and then choose Register on the sign-in page.You can also open the registration page directly.
2
Enter your email
Enter an address you can access in the Email field. Check the spelling before continuing.
3
Create and confirm a password
Enter a password with at least 6 characters, then enter it again in Confirm password. The two values must match.Select the eye icon to check the value you entered.
4
Add optional codes
Enter an Invitation code or Promo code if you have one. Leave these fields empty when you do not have a code.
5
Send the verification email
Click Continue. aibal.ai sends a verification code to your email and opens the verification page.If the page reports that registration is unavailable, your email domain is not supported, or a code is invalid, follow the message on the page.
6
Verify your email
Open the message from aibal.ai, copy the 6-digit code, and enter it on the verification page.Click Verify and create account. If the message does not arrive, check your spam folder and use Resend code.
7
Open the dashboard
After verification, aibal.ai creates the account and opens the dashboard. Review the available groups, models, balance, and billing rules before making a request.
Field reference
After registration
- Confirm that your email can receive account notices.
- Review your balance, available plans, and models in the dashboard.
- Read the limits, validity period, and billing rules for the selected group.
- Follow Create an API Key to create a key for API calls.